A Cake for Dad

My dad taught me a lot over the years. For as far back as I can
remember, he has been telling me that I am strong and capable, and that I
can do anything that I set my mind to. For that, I owe him more than I
can ever say -- he is a big part of who I am today, and for that I will
always be grateful. Another thing that he taught me? Don't give up.
And that's good, because the first cake that I attempted over the past
weekend was a total and absolute disaster. Actually, I take that back.
I didn't even get to try to bake the cake because the very first step in making the frosting failed.
Utterly and miserably. That really is the only way to describe it when
you get no peaks even after beating your egg whites for over 30
minutes. 30 minutes. My poor Kitchen-aid mixer. But the
problems had started even before that. The cake pans that I had ordered
specifically for this particular cake didn't arrive until the day after
I had originally planned on making it. Because I couldn't find instant
espresso powder, I had to make it from dried out espresso
grounds, and after my failed buttercream, I didn't have any more
available. . .and I couldn't make any more because my husband (who
happens to be the only one who knows how to use our espresso machine)
was out of town. Sigh. . .the fates were against me, but it was
Father's Day weekend! And my father was visiting me from out of town!
And he taught me to never give up. . . so I rallied my inner baking strength
and made a cake. A different cake, yes, but you know what? I think that, in the end, it was a
better cake than the first one could ever have been. And
there it is. . . me using the lessons my dad taught me to make a
Father's Day success. Fitting, I think. So here it is, the Father's
Day Cake, (or Chocolate-Covered Cherries Cake.)
Next step -- filling and frosting. I recently found a well-rated recipe for Italian Meringue Buttercream (of note, the same kind of buttercream that had so miserably failed the day before), once again from the usually fail-safe King Arthur's Flour, and this seemed to be the perfect time to give it a go.
This is where I tried to get creative. I had already melted 6 oz of bittersweet chocolate in anticipation of the first cake that I had planned on making, and anyone who has bought baking chocolate knows that it is expensive. No way was I was going to waste it if I could help it (and it was chocolate -- my heart would be sad if I wasted chocolate for any reason, really.) I also had some leftover cherry filling in the refrigerator from making pies earlier in the week. (Cherries -- also expensive and also preferable not to waste). Hmmm, chocolates. . . cherries. . . those occasionally go well together. . . So, I took about half a cup of the buttercream and folded in half a cup of the cherry pie filling to make a cherry buttercream.

The cherry buttercream was spread on top of one of the 8 in cakes.

The second cake goes on top, and then comes the fun part -- the decorating! Well, not yet, I suppose -- the whole cake first gets a thin layer of buttercream, to create a nice even, straight work surface, and then comes the decorating. Because it was for Father's Day, I kept the white buttercream for the top of the cake, so I could write on it, and created a nice bright blue buttercream for the sides of the cake (by adding A LOT of blue food coloring. When you color buttercream, make sure to use a gel food color; the frosting will break if you use a liquid.)
I've seen cakes with frills on the sides of cakes all over the internet for the past few months and have wanted to try the technique for a while, so this was the perfect opportunity. Although all of the blogs I've seen about "frills," or "ribbons" vow that they are extremely easy decorations, I wasn't so sure it would be true. But it was! Very, very easy.

My go-to White Cake Recipe, by the always fabulous King Arthur's Flour.
White Cake
Ingredients:
Cake Flour
Sugar
Baking Powder
Salt
Unsalted Butter
Egg Whites + Whole Egg
Milk
Vanilla Extract
Almond Extract
Easy-peasy -- mix the dry ingredients, add the butter (make sure it is room temperature) and mix until blended, add the eggs and mix until blended. Combine the milk and extracts, and add to the primary mixture 1/3 at a time. Mix until fluffy (and that means really fluffy -- the batter almost completely filled my bowl by the end.) Spray 2 8 in or 9 in pans with PAM and divide the batter between them. Bake at 350 degrees for 25 to 30 min. Make sure that you check the cake at 25 minutes. I baked until 30 min and, although it was still good, the cakes probably would have been slightly moister if I took the pans out earlier.
Next step -- filling and frosting. I recently found a well-rated recipe for Italian Meringue Buttercream (of note, the same kind of buttercream that had so miserably failed the day before), once again from the usually fail-safe King Arthur's Flour, and this seemed to be the perfect time to give it a go.
Italian Meringue Buttercream
Ingredients:
Sugar
Water
Egg Whites
Salt
Butter (it is essential that this is room temperature)
For this particular buttercream, it is important to follow each step exactly. Please refer to the link for the exact amount of each ingredient.
- Combine egg whites, water, and salt and beat at high speed until the mixture looks white and thick.

- While the eggs are being beaten, part of the sugar and water are combined in a saucepan and heated over medium heat until the sugar dissolves. At this time, place a candy thermometer (essential) into the sugar syrup mixture and do not touch until the reading is at least 240 degrees, but no more than 250 degrees.
- By this time the egg white mixture should have formed stiff peaks. If stiff peaks form before the sugar mixture is ready, continue to move the egg whites around on low speed.
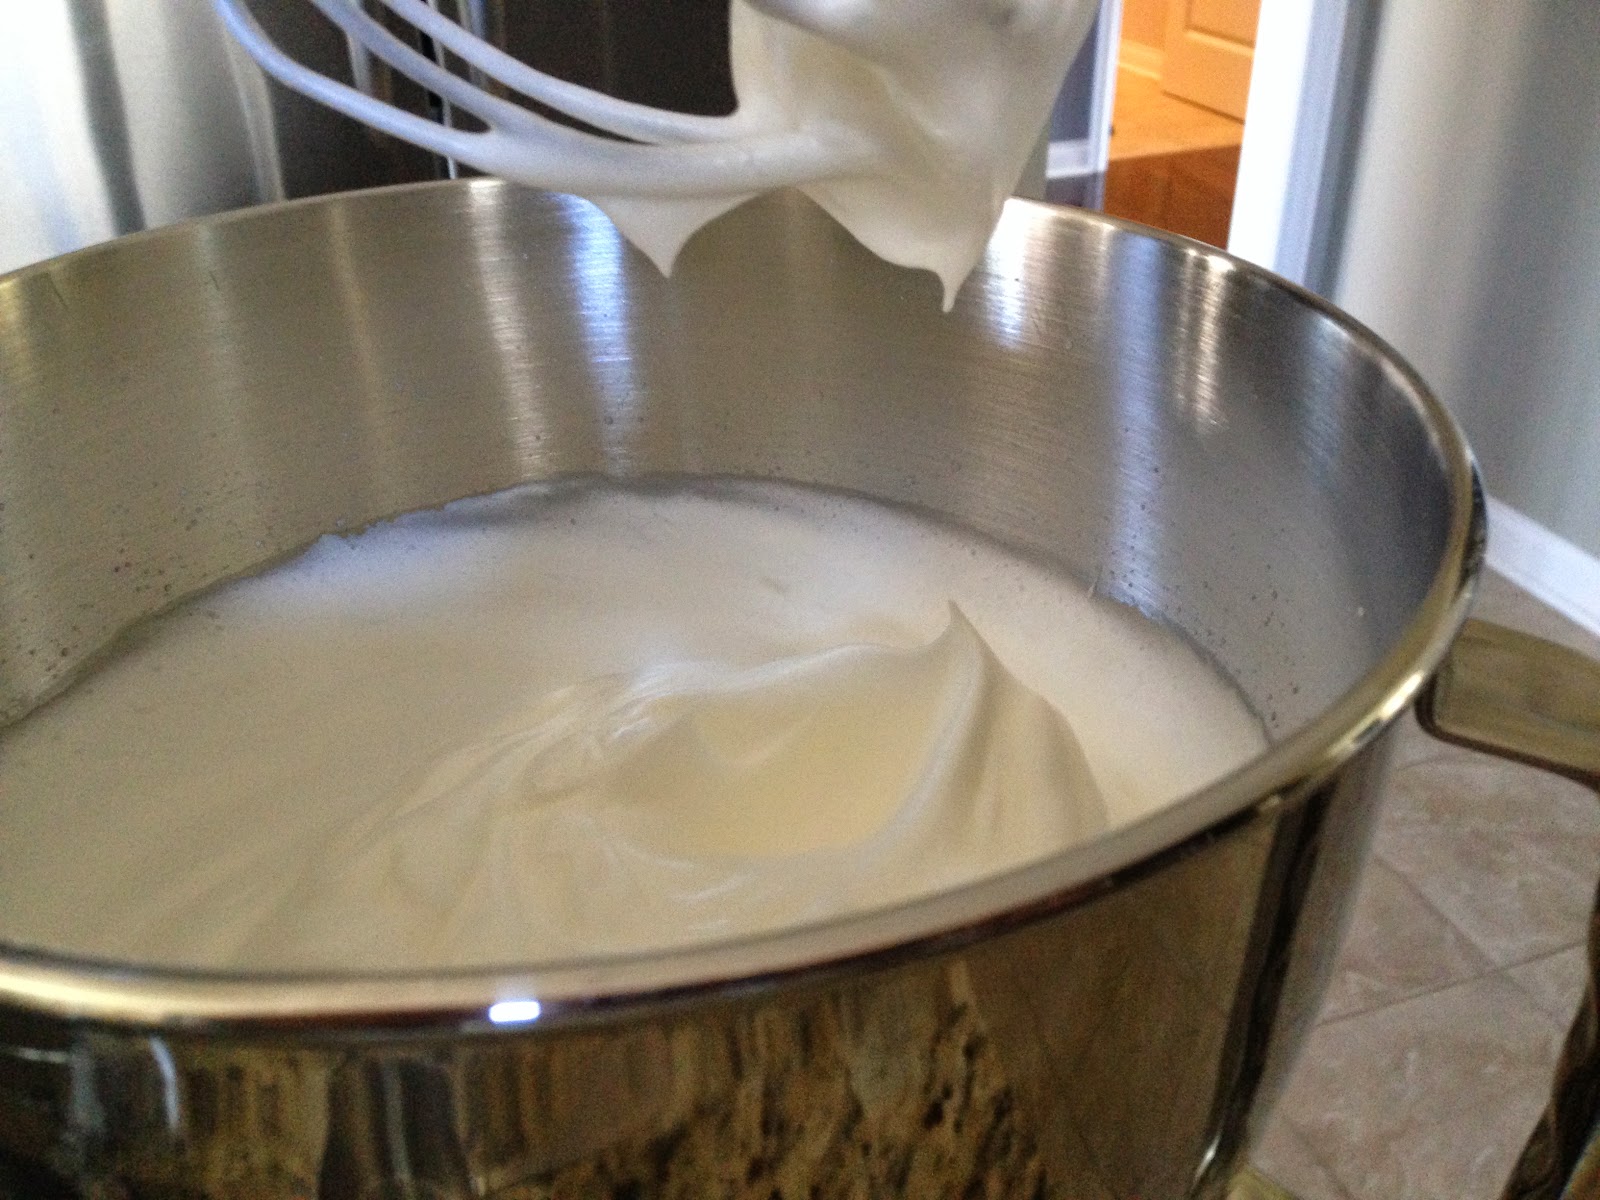
- When the sugar mixture is ready, pour along side the mixing bowl into the egg mixture, while beating at high speed, making sure to avoid the whisk. Be careful and don't burn yourself -- sugar burns are awful!

- Keep mixing until the temperature drops to 80 degrees, about 20 minutes. At that time, start adding the butter a little at a time and beat until fluffy. The recipe suggests adding vegetable shortening to stabilize the frosting if you will be piping with it, but I found that it pipes well without the addition also. I did add two teaspoons of vanilla paste to flavor the buttercream.
This is where I tried to get creative. I had already melted 6 oz of bittersweet chocolate in anticipation of the first cake that I had planned on making, and anyone who has bought baking chocolate knows that it is expensive. No way was I was going to waste it if I could help it (and it was chocolate -- my heart would be sad if I wasted chocolate for any reason, really.) I also had some leftover cherry filling in the refrigerator from making pies earlier in the week. (Cherries -- also expensive and also preferable not to waste). Hmmm, chocolates. . . cherries. . . those occasionally go well together. . . So, I took about half a cup of the buttercream and folded in half a cup of the cherry pie filling to make a cherry buttercream.
For those of you interested in the Cherry Pie Filling:
Ingredients:
2 cups fresh cherries, stemmed and pitted
2/3 cup dried cherries
1/2 cup sugar
1 tsp vanilla extract
1 1/2 tbsp cornstarch
- Combine cornstarch with 1 1/2 tbsp cold water
- Combine remainder of ingredients in a small saucepan and heat until cherry juices release
- Combine with cornstarch mixture and bring to a boil, stirring frequently
- Cool
The cherry buttercream was spread on top of one of the 8 in cakes.
And then, the melted, and cooled, chocolate was spooned on the buttercream and spread evenly along the surface. The best part about using unadulterated chocolate instead of ganache, is that the chocolate will solidify once entirely cooled and give a subtle crunch to the finished cake.
The second cake goes on top, and then comes the fun part -- the decorating! Well, not yet, I suppose -- the whole cake first gets a thin layer of buttercream, to create a nice even, straight work surface, and then comes the decorating. Because it was for Father's Day, I kept the white buttercream for the top of the cake, so I could write on it, and created a nice bright blue buttercream for the sides of the cake (by adding A LOT of blue food coloring. When you color buttercream, make sure to use a gel food color; the frosting will break if you use a liquid.)
I've seen cakes with frills on the sides of cakes all over the internet for the past few months and have wanted to try the technique for a while, so this was the perfect opportunity. Although all of the blogs I've seen about "frills," or "ribbons" vow that they are extremely easy decorations, I wasn't so sure it would be true. But it was! Very, very easy.
Here's how you do it:
- Prepare a large pastry bag with a rose tip (the larger, the easier)
- Fill with buttercream
- Twist the top of the bag so that no buttercream escapes and hold with one hand; stabilize the mid-part of the bag with your other hand. For me, it was most comfortable to have my left hand at the top of the bag and my right hand stabilizing, but I'm guessing that that may be different for everyone.
- Line the bag up so that the tip is perpendicular to the bottom of the cake (parallel to and touching the cake plate) with the wider opening abutting the cake.
- Apply gentle pressure with whichever hand is holding the top of the bag and move the bag in a zig-zag motion, while slowly moving up the cake.
Voila!
And the perseverance paid off! Just like my dad always said it would.


Comments
Post a Comment