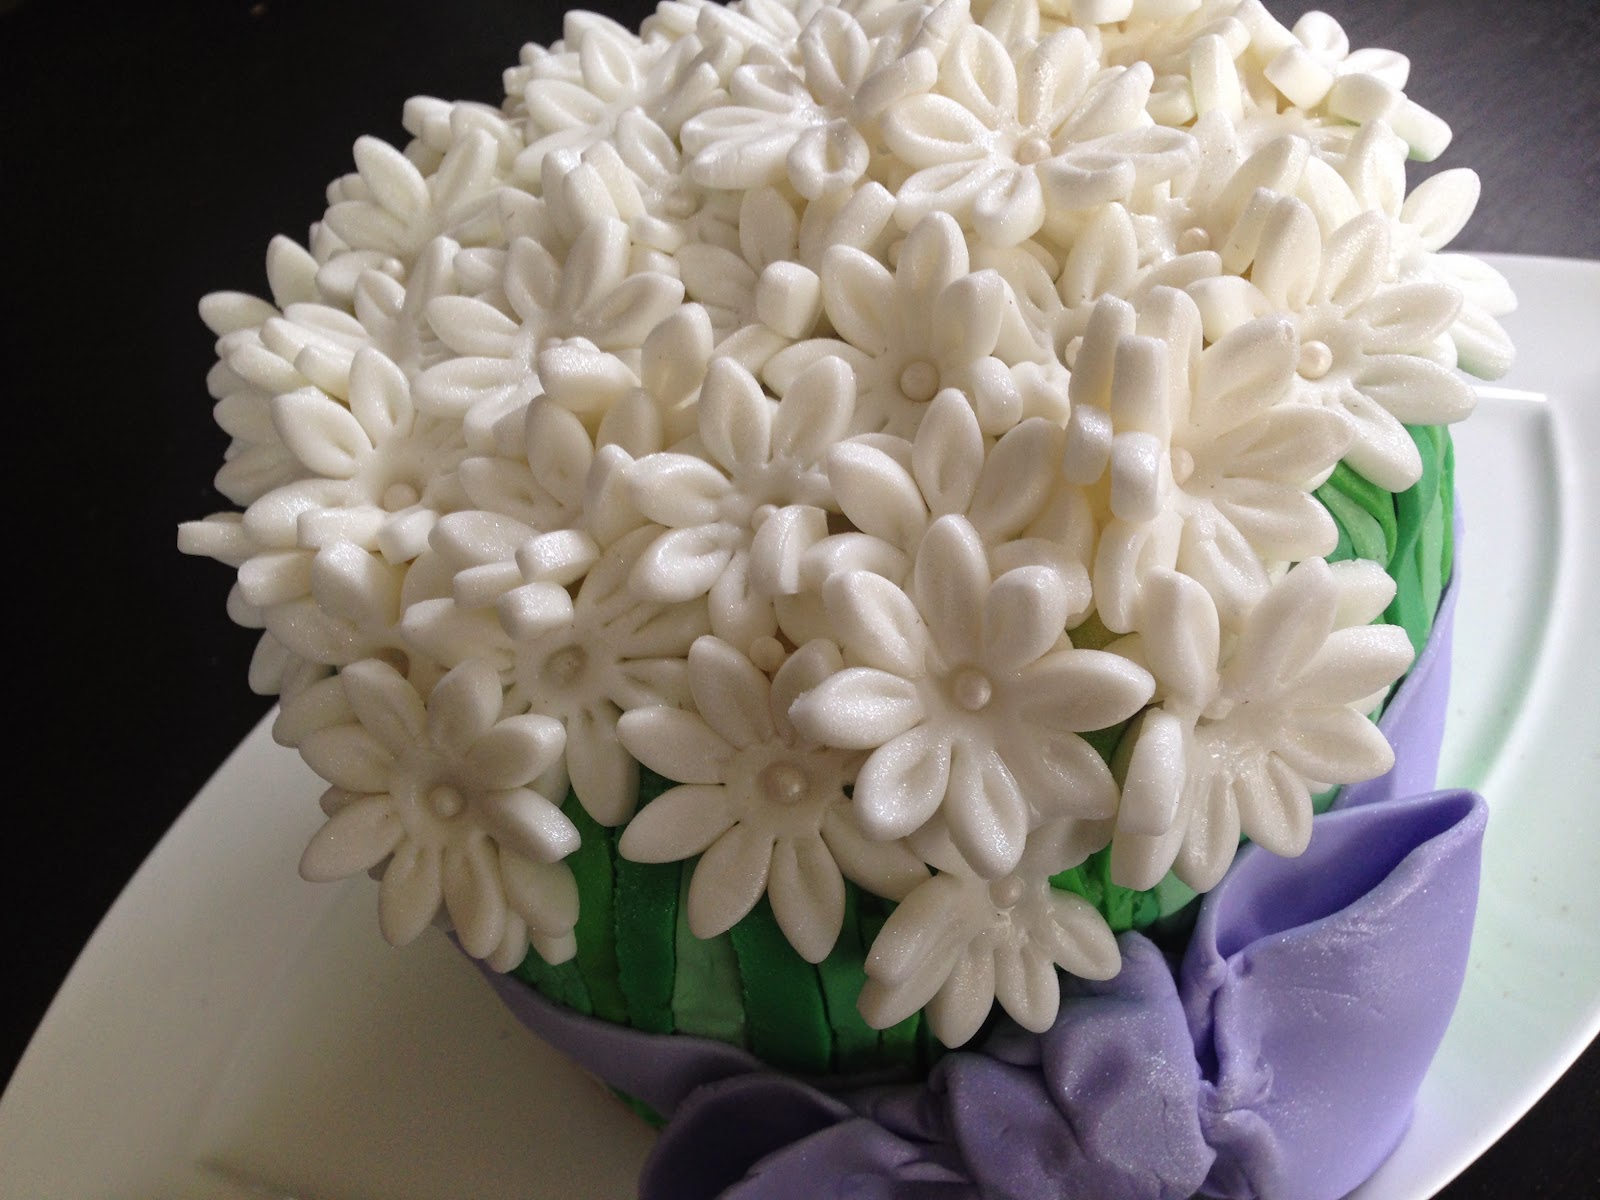
April Showers Bring Cake Flowers

Chocolate Cake with Cream Cheese Frosting and Macerated Strawberries
Chocolate CakeThis may be my favorite chocolate cake recipe. And its a boxed cake recipe. That's right -- Duncan Hines to be exact. Just a few add-ins and you'd never believe it started its life on a dry goods shelf.Ingredients:1 Box Duncan Hines Dark Chocolate Fudge Cake1 Package Jello Instant Chocolate Pudding Mix4 Eggs1/3 Cup Butter1 Tbsp Ground coffee
1 Cup Water
Method:
Combine at low speed for 30 seconds, so as to ensure that the ingredients don't splash everywhere. (If you succeed at this, you're already ahead of me. My mixer seems to start on "splash everything everywhere" speed.)Mix at medium speed for an additional two minutes.Pour into 2 8-in cake pans or 3 6-in cake pans.Bake at 350 degrees for 35 to 40 minutes, when a toothpick inserted into the center should be clean upon removal.Cool on a wire rack.
Meanwhile:
Macerated Strawberries
Ingredients:
1 Cup Strawberries, cored and sliced
3 Tbsp Powdered Sugar
Method:
Place strawberries in shallow bowl. Sprinkle with powdered sugar and gently mix with spoon. Set aside for 30 minutes
Cream Cheese Frosting
Note: This makes enough frosting for a two layer 6-in cake. If you are doing a larger cake, you may want to double the recipe
Ingredients:
2 8-oz Containers Cream Cheese, softened
1/2 Cup Butter, softened
1 tsp Vanilla Extract
2 Cups Powdered Sugar
Method:
Beat, slowly at first to incorporate ingredients, then at high speed until fluffy.
Putting it all together
Level one of the cake layers using a serrated bread knife. Leave the other with a domed top. On top of the leveled cake layer, scoop a generous amount of cream cheese and spread evenly, leaving approximately a 3/4 inch border without frosting. Layer the macerated strawberries on top of the cream cheese. Spread a thin layer of frosting over the strawberries. Place the domed cake on top and press slightly as needed to ensure that cake is even. Frost the entire cake. Set aside.
Decorating
Tools and Ingredients:
2 Packages Wiltons Decorators Preferred Fondant in White
Small Daisy Fondant Punch
White Candy Pearls
Green Gel Food Coloring
Purple Gel Food Coloring
Foam Pad
Veining Tool
Small Paintbrush and Fluffy Paintbrush
Shortening
Wilton Pearl Dust
Cake Pop Pan
Wilton Pearl Dust
Method:
Unwrap one package of fondant and knead until pliable, adding shortening as needed to prevent sticking. Set aside a fist sized amount of fondant and cover with plastic wrap. Roll out the remaining fondant to 1/4 in thickness. Punch daisies until the entire sheet of fondant has been used. Place each daisy on the foam pad and draw the veining tip from the center to the periphery of each petal. Push the end of the paintbrush into the center of each flower, so that the petals jut upwards. Lay upside down on an inverted cake pop pan.
With the second package of fondant: Again, mold until pliable. Divide the ball into four balls of approximately equal size. Dye each ball a different shade of green using varying amounts of the gel coloring. Roll each fondant ball out into a sheet -- at least 1/4 to 1/3 inch in thickness. Cut uniform thickness strips to resemble stems from each sheet. (In the future, I would use a pasta maker to ensure uniform strips -- evidently my hand-eye coordination wasn't as good as I would have imagined, judging from the final look of the "stems.") Take each stem and tack it to the cake. Since the cake is already covered in frosting, this shouldn't be hard. When the cake is completely covered, trip the tops to align with the top of the cake, using kitchen shears.
Take the fist sized amount of fondant that was set aside earlier. Using the purple coloring, tint to desired shade. Take about 1/3 of the fondant and roll into a square. Cut into two rectangles. Fold one side over to the other side to make a loop for a bow. Pinch to a point. Do the same on the other side. Join the two loops, pointy ends together. They will look a little messy, but that will be covered. Take quarter sized chunk of fondant from the primary roll and roll into a smaller rectangle. Scrunch the fondant in small folds and wrap around the pointy rough edge sides of the loops , with the "scrunches" running vertically, to form a bow. Roll out the remainder of the fondant into a long ribbon. Brush one side with water using the small paintbrush. Being very careful -- wrap the ribbon around the cake (at the center if possible.) Because the ribbon is so long, there will be a tendency for the fondant to break while being applied, so work as quickly as possible. Apply the bow to the fondant at the front of the cake using water as the binding agent. You may have to support the bow until it dries, since it's heavy enough that it may fall off from its own weight.
Back to the flowers: Unmold the flowers from the cake pop pan. Cover the top of the cake with the flowers -- the more the better. Trail some of the flowers down the side of the cake as well. When attaching fondant (flowers) to fondant (stems), use a little bit of water applied with the paintbrush to act as a binding agent.
Dab the center of each flower with a few drops of water, and press in a sugar pearl. Tap out some sparkle dust onto a small plate. Using a fluffy brush, brush the whole cake with a thin layer of dust.
And there you have your ever-blooming, ever-bright, bouquet of spring daisies:


Comments
Post a Comment