Cup of Sugar, Pinch of Love and the Chocolate Factory
Who else is so excited about the BFG finally being made into a movie?? I was actually much more obsessed with Beverly Cleary in my grade school days than Roald Dahl, but the BFG was fantastic work. Friendly giants, dreams in jars -- what's not to love? I have to admit, Charlie and the Chocolate Factory wasn't my favorite -- Violet Beauregarde blowing up like a blueberry kind of freaked me out, to be honest. But I was a fan of the chocolate factory itself, because, uh, well -- CHOCOLATE FACTORY?! No explanation needed, right?
So I decided to stray a little from my comfort zone, (which to be honest, hasn't been all that comfortable lately -- a slew of unexpected baking disasters = no blog posts in the past couple of months, for those who have been wondering) and explore chocolate making. It is, at once, easier and much more difficult that one would imagine. On the plus side -- it doesn't take that long at all. A batch of 12 chocolates can be done in less than half an hour -- and a lot of that time is spent waiting for the chocolate to set. However, it does require regimented organization and vigilance (if you don't want to burn that lovely, expensive, and more importantly delicious, chocolate.) And even with all that care, your kitchen will look like a bomb hit it at the end -- at least mine did! Here's a quick tutorial if you dare to try. . .
Materials:
Silicone Chocolate Mold
High Quality Chocolate
Candy Food Colors and Edible Dusts for decoration
Mix-Ins
Drying Rack/ Cooling Rack with plate underneath
Process:
The most important (and fun) part -- decide what kind of chocolates you want to make. I settled on four flavors: Blueberry Lemon, Caramel Caramelia, Maple Crunch, and Peanut Butter and Jelly . Different chocolate bases for each flavor, so a total of four types of chocolate: Lemon, Caramelia, White, and Dulce. I tried to make all four types of chocolate at one time. It definitely added to the headache. To make things easier, make one type of chocolate at a time.
Blueberry Lemon:
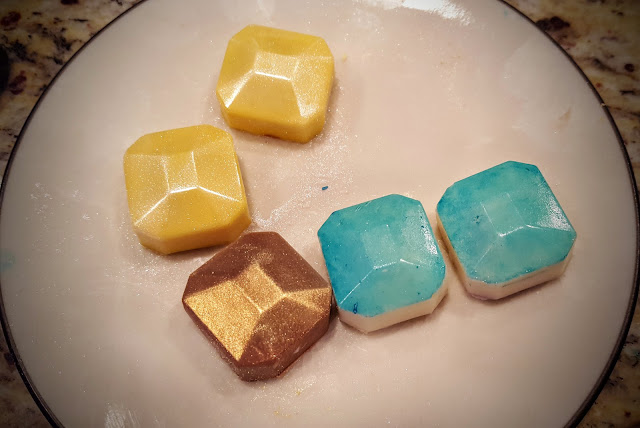
Melt lemon baking chocolate in the microwave at 50% power, 30 seconds at a time. When the chocolate is almost completely melted, but a few chunks remain, check it with increased frequency, otherwise it will burn and is forever ruined. When the chocolate is fully melted, spoon into molds until each mold is full, then immediately flip the molds onto the drying rack so the chocolate falls out onto the plate below. This will result in a thin layer of chocolate lining the molds. Using a spatula or cake smoother, "wipe" the molds with a smooth motion, one side to the other to clean the borders of the shells. Pop into the freezer for five to ten minutes. The chocolate should loose its shiny appearance and look matte when ready. Lightly touch the chocolate to make sure it's solid. Place a reconstituted dried blueberry or two, depending on what fits, into the mold and spoon additional chocolate on top to fill the cavities. "Wipe" the tops again so the chocolates are flat. Pop in the freezer for another 5 to 10 minutes. When completely hard, unmold onto a cold surface and trim the edges of each chocolate individually with an X-acto knife. Work quickly, because the heat of your hands will cause the chocolates to melt. Dust with a colored or pearlescent edible dust.
Caramel Caramelia:
Melt the chocolate and line the molds as above. When ready to fill, spoon approximately 1/2 tsp of caramel ice cream topping into each mold, and refreeze for five to ten minutes. Top with a flake or two of Maldon sea salt and seal with more of the chocolate. Wipe the molds as above and refreeze for five to ten minutes again; unmold and decorate as above.
Maple Crunch:Melt the chocolate (White) and line the molds as above. When ready to fill, place a layer of maple flakes at the bottom of each mold. Fill the molds almost, but not quite, to the top with crunchy chocolate pearls. Fill with gaps with white chocolate and freeze for five to ten minutes. After unmolding, use a fine detail paintbrush to paint food color onto the top of the chocolates. Blot with a paper towel.
Peanut Butter and Jelly:
Take a toothpick of two complementary food colors and wipe onto two different fingers. Swipe each finger through each mold. Colors should touch and can overlap slightly, but should not overlap entirely. Melt the chocolate (Dulcey) and line the molds as above. When ready to fill, spoon approximately 1/4 tsp of peanut butter into each mold and smooth. Spoon 1/4 tsp of jelly on top of the peanut butter in each mold and smooth. Top with chocolate and wipe as above. Refreeze and then unmold as directed above.
 |
| Freshly unmolded, before decorating |
 | ||||||||
| After decorating |

And ready to eat!


Comments
Post a Comment